lunes, 22 de junio de 2015

Roundcube Next It sounds impressive, but needs help to come true

Roundcube Next  It is one of the most popular clients in the world in general mail and the world of free software in particular, but not in the style of Thunderbird or Evolution, but as a web application or webmail. Roundcube, in fact, is one of the most widely used alternative to mailing company or own accommodation. However, there is little old and needs a thorough regeneration. ¿You contribute?

You can bring your granazo, or granite, that depends on the personality of sand in the campaign of collective financing the project is underway in Indiegogo, which is right now in halfway. This is also a fixed crowdfunding campaign, which means that only if they reach their goal of $ 80,000 within 14 days, may realize planned. And it's a lot.


The news that await you Roundcube to get the money are the most interesting, and span from the inside out, not to mention a string of new features to update the software these days: chat and VoIP support, collaborative editing of documents in the cloud, editor renovated messages, personal organizer to do list and notes, advanced management label, customizable interface ... It is advisable to read the presentation of the entire campaign, because the thing is strong.

And look good because of that hope to raise $ 80,000, already have more than 62,000. So feel free to scratch your pocket a little if you can, because the project deserves. A personal note: I've been using Roundcube many years and despite the powerful of the "road map" for the next version, has been to see the new interface and ... wow!

Available Mageia 5 with support UEFI

Mageia 5


Has been a long road since the previous version, but the wait is over: Mageia 5 is submitted to all complete and polished than ever.
The announcement of Mageia launch five emphasizes one of the main focuses of effort for this release, and is none other than support UEFI. The installer system has undergone much work the developers of the distribution to ensure that even "the most exotic settings" you have secure boot Microsoft, and such dedication installer system itself benefits in other sections, such as RAID support, integration GRUB2, changes in the partitioning and error correction.

As shown, Mageia 5 offers variety, but perhaps too much restraint as far as relates to new versions as is the courtyard. However, it is a community project with limited resources. Not everything at the last, but it is possible that the user experience is more positive and focused on stability rather than novelty.
And now I try apetecería Mageia five honeys? In the download section you will find them. And if you want to know more about this release in the release notes are given all the details, including how to upgrade from Mageia 4.


Beyond the news installer Mageia 5 are understood based on updates of all packages that make up the system from the Linux kernel 3.19 a supported desktop environments, KDE 4.14, Plasma 5.1, GNOME 3.14, Cinnamon 2.4, 1.8 MATE , Xfce LXQt 4.12 and 0.9; or the most popular applications like LibreOffice 4.4 or Firefox 31 ESR, the upgrade to version 38 ESR is expected shortly. This would be a small sample of the nearly 2,000 applications and 25,000 packages available in the official repositories.

Manjaro 0.8.13

http://blog.desdelinux.net/wp-content/uploads/2015/06/Manjaro1.png?061bda

Manjaro 0.8.13 has been mounted on the carriage of Plasma 5 promises have corrected all possible bugs in KDE presented in May.

Manjaro2 


Download here:
http://manjaro.github.io/download/ 

Lolcat, a fun application of Linux terminal that will fill your screen color.

lolcat

Lolcat is proof that you can turn the Linux terminal fun, and that is that the fund should not impose much respect as usual. This is a program that works through a pipeline that gives the rainbow colors to whatever comes in the terminal.
It really has not much else, it is just a small tool to make the terminal more fun, but if you want to have it on your computer you will have to go through a few steps of installation. This is because Lolcat has no official repositiorios, and therefore we must get it and set it in other ways.
However, once we got Lolcat can begin to play. It is designed to be a fun tool that will help us to give a different touch to what we do in the terminal.Installing Lolcat
To use Lolcat in our Linux have to first install Ruby first of all. To do this open a terminal and use the following command:

 sudo apt-get install ruby
 
As ruby is installed we check its version with this other command:
 
 ruby --version

 ruby 2.1.5p273 (2014-11-13) [x86_64-linux-gnu]
 
Now that we have Ruby can already consider installing Lolcat. For it will download a ZIP file of the network and install it with these commands:
 
 wget https://github.com/busyloop/lolcat/archive/master.zip
 unzip master.zip
 cd lolcat-master/bin
 sudo gem install lolcat
 
And with this we have installed and ready to run Lolcat.

Usando Lolcat

Lolcat funciona como un pipeline tal y como señalábamos antes, y por ello tenemos que “hacer que un comando pase por Lolcat”. Puede pasar cualquiera, así que esto es lo que pasa cuando hacemos un ls -la | lolcat:

lolcat ls

 Interesting, right? Well, if you can still install cowsay it is more. For that we open a terminal and type the following:
 
 sudo apt-get install cowsay


jueves, 11 de junio de 2015

Tickr Is An Open-Source RSS News Ticker for Linux Desktops

rss-tickr


Latest! Latest! Read all about it!
Alright, so the app we’re highlighting today isn’t quite the binary version of an old newspaper seller — but it is a great way to have the latest news brought to you, on your desktop.
Tick is a GTK-based news ticker for the Linux desktop that scrolls the latest headlines and article titles from your favourite RSS feeds in horizontal strip that you can place anywhere on your desktop.
Call me Joey Calamezzo; I put mine on the bottom TV news station style.
“Over to you, sub-heading.”

RSS — Remember That?

“Thanks paragraph ending.”
In an era of push notifications, social media, and clickbait, cajoling us into reading the latest mind-blowing, humanity saving listicle ASAP, RSS can seem a bit old hat.
For me? Well, RSS lives up to its name of Really Simple Syndication. It’s the easiest, most manageable way to have news  come to me. I can manage and read stuff when I want; there’s no urgency to view lest the tweet vanish into the stream or the push notification vanish.
The beauty of Tickr is in its utility. You can have a constant stream of news trundling along the bottom of your screen, which you can passively glance at from time to time.
tickr close up
There’s no pressure to ‘read’ or ‘mark all read’ or any of that. When you see something you want to read you just click it to open it in a web browser.

Setting it Up

tickr-rss-settings
Although Tickr is available to install from the Ubuntu Software Centre it hasn’t been updated for a long time. Nowhere is this sense of abandonment more keenly felt than when opening the unwieldy and unintuitive configuration panel.
To open it:
  1. Right click on the Tickr bar
  2. Go to Edit > Preferences
  3. Adjust the various settings
Row after row of options and settings, few of which seem to make sense at first. But poke and prod around and you’ll controls for pretty much everything, including:
  • Set scrolling speed
  • Choose behaviour when mousing over
  • Feed update frequency
  • Font, including font sizes and color
  • Separator character  (‘delineator’)
  • Position of Tickr on screen
  • Color and opacity of Tickr bar
  • Choose how many articles each feed displays
One ‘quirk’ worth mentioning is that pressing the ‘Apply’ only updates the on-screen Tickr to preview changes. For changes to take effect when you exit the Preferences window you need to click ‘OK’.
Getting the bar to sit flush on your display can also take a fair bit of tweaking, especially on Unity.
Press the “full width button” to have the app auto-detect your screen width. By default when placed at the top or bottom it leaves a 25px gap (the app was created back in the days of GNOME 2.x desktops). After hitting the top or bottom buttons just add an extra 25 pixels to the input box compensate for this.
Other options available include: choose which browser articles open in; whether Tickr appears within a regular window frame; whether a clock is shown; and how often the app checks feed for articles.

Adding Feeds

Tickr comes with a built-in list of over 30 different feeds, ranging from technology blogs to mainstream news services.
feed-picker
You can select as many of these as you like to show headlines in the on screen ticker. If you want to add your own feeds you can: –
  1. Right click on the Tickr bar
  2. Go to File > Open Feed
  3. Enter Feed URL
  4. Click ‘Add/Upd’ button
  5. Click ‘OK (select)’
To set  how many items from each feed shows in the ticker change the “Read N items max per feed” in the other preferences window.

Install Tickr in Ubuntu 14.04 LTS and Up

So that’s Tickr. It’s not going to change the world but it will keep you abreast of what’s happening in it.
To install it in Ubuntu 14.04 LTS or later head to the Ubuntu Software Centre but clicking the button below
 
Install here: apt://tickr

Brand New Ubuntu Phone Goes on Sale Priced at €199

The third Ubuntu phone goes on sale today across Europe priced at €199.90.
The Bq Aquaris E5 Ubuntu Edition was announced last week and features a bigger screen and better cameras than the first Ubuntu phone released earlier in the year.
It also comes with improved battery capacity to help the device last longer and sharper, high-definition display. 
‘An Ubuntu phone that turns into a PC is coming this October’


bq aquaris E5

More Ubuntu Phones Are Coming

Its arrival sees Ubuntu Phone releases beginning to pick up pace.
February saw the first Ubuntu Phone, the Bq Aquaris E4.5, go on sale in Europe. Chinese hardware company Meizu held a fire sale for its MX4 device in May.
Neither Canonical, Bq or Meizu is (yet) willing to say how many of Ubuntu Phones have been sold so far.
ubuntu phone scopes
The Ubuntu Phone experience is built around Scopes
Meizu also plan to sell their handset in Europe later month through an ‘invite-only’ online sale.
Last week we exclusively revealed that Bq is working on another Ubuntu Phone.
This device will feature powerful hardware that supports Canonical’s “convergence” technology, and will  transform from a mobile phone to a desktop PC when connected to a monitor, keyboard and mouse.
Even better, it’s currently targeting an October 2015 release.
‘Check out the specs of the new Ubuntu Phone’
(tweet this)

Aquaris E5 Specifications

Back to the device almost literally in hand.
The Aquaris E5 Ubuntu Edition comes in one color, black, and one memory size, 16GB.
It has the same hardware specifications as the E4.5, using a quad-core MediaTek processor paired with 1GB RAM. This delvers decent performance when running the OS and multi-tasking with scopes and the (primarily web-based) apps available.
bq aquaris e5 specs
The cameras see improvements. Both rear and front shooters have been fitted out with BSI sensors and Largan lenses. The rear camera takes photos of up to 13 megapixels while the front snaps selfies of up to 5 megapixels in quality.
A MicroSD Card slot allows for storage expansion up to 32GB, while a standard micro-USB port is offered for charing and connectivity.

Buy the Bq Aquaris E5 Ubuntu Edition

‘A new 5-inch Ubuntu Phone is now available to buy’
The price of the phone starts at €199.90, cheaper than the same model as sold with Android but $30 more expensive than the Aquarius E4.5 Ubuntu Edition.
And this time around there are no limited-time “flash sales” or, like the plan for the Meizu MX4 which goes on sale later this month, any need to hunt down an invite.
But while the phone can be purchased from today orders won’t be processed until June 22nd.


Buy it: http://www.bq.com/gb/aquaris-e5-ubuntu-edition

martes, 9 de junio de 2015

Add a Google Now-Style Weather Applet to The Ubuntu Desktop

DeviantArt user satya164 has knocked together a Google Now-inspired theme for Conky, the popular Linux system monitor (and a whole heap more).
Unlike many Conky themes this one is light on information displayed, only showing weather and network usage.
Google Now Conky Theme on Ubuntu 13.10
But like most Conky themes it is a faff to set up.

How to Install Conky Google Now

The instructions below are for Ubuntu, but also apply to its flavours and other Ubuntu-based distributions like Linux Mint.
Before you do anything you first have to install Conky itself. If you’re reading this article on Ubuntu you can hit the button below to open an install prompt.

Ubuntu Software Center:  apt://conky-all
You may also need to grab Curl if it’s not already installed: apt://curl


Once you have fully downloaded the .Zip you need to extract it, and move the files inside to your home folder:
fodlering
That’s all that’s needed to install the Conky theme. But you’ll need to edit the weather location to match that of your own:
  • Go to weather.yahoo.com
  • Search for your location in the weather search box (underneath forecast)
  • Copy the numerical string in the URL
Now:
  • Open .conkyrc in your Home folder
  • Find the number: ‘2294941’
  • Replace it with the numerical string you copied from the Yahoo! Weather URL
  • Save
replace
If you like the font used in the screenshot, you can grab it from Font Squirrel (for free) – but install it before launching Conky from a Terminal with the command ‘conky’.
Want Conky to open when you login to Ubuntu? You’ll need to add it to Startup Applications. 
  • Open ‘startup applications’ from the Dash
  • Click ‘Add’
  • In both name and command fields enter ‘conky‘ (without quote marks)
  • Save

Icon Themes

Captiva

moka and captiva 

To install Captiva icons in Ubuntu 14.04 you can add the official PPA by opening a new Terminal window and enter the following commands:
sudo add-apt-repository ppa:captiva/ppa
sudo apt-get update && sudo apt-get install captiva-icon-theme
 

Square Beam


Square Beam icon set with  

 http://gnome-look.org/content/show.php/Square-Beam?content=165094


Moka & Faba

moka-faba 

 http://mokaproject.com/moka-icon-theme/download/ubuntu/


Compass

compass 

It’s available to download and install manually through GNOME-Look (link below) or through the Nitrux Artwork PPA:
sudo add-apt-repository ppa:nitrux/nitrux-artwork
sudo apt-get update && sudo apt-get install compass-icon-theme

Easily Change Color of Folder Icons in Ubuntu With This Tool

Ubuntu’s default folder icons are nice enough but their uniform orange appearance lacks personality.

To add a splash of vibrance we can use a small tool called ‘Folder Color’. It’s designed to work with Nautilus and can only be used with the default Ubuntu icon theme.
The name pretty much spells out its function: it lets you to change the colour of folders. With it you can make your essay documents folder red, your holiday photo directory yellow, and so on, with a simple right-click.

There’s really not an awful lot more to say about it. It’s not a separate icon theme and does not, yet, allow you to change the colour of the standard Home folder icons (Music, Photos, Documents, etc.).
Other than that it works as intended, has a fairly decent number of colour options available, and offers a handy link should you wish to ‘Restore to default’.

Installing Folder Color

While not a game-changing app Folder Color is nevertheless a useful tool to have if you ever fancy retooling your home folder to look like a rainbow.
The utility can be installed from a dedicated PPA using the command line and supports Ubuntu 13.10 and 14.04 LTS.
sudo add-apt-repository ppa:costales/folder-color
sudo apt-get update && sudo apt-get install folder-color
After installation has completed you will need to log out and back (or restart Nautilus) before the right-click options are listed.

domingo, 7 de junio de 2015

Free Host

List of Host Free


http://ayudawp.com/wp-content/uploads/2009/01/hosting.jpg

Here I leave a list of different hostings that can serve paragraph accommodate Shipping their websites , and start making magic on the internet, who already have to leave your secure link q must be very good as para criticize other.

1. http://www.wwwpuntocom.com
Limited space, ftp, php/mysql, control panel, ranking de webs, but no advertisements.

2. http://www.miarroba.com
PHP/MySQL, 25 MB, you can choose advertisements, banner or popup

3. http://www.tripod.lycos.es
Lycos, 50 MB, PHP/MySQL. size of files limited.

4. http://www.multimania.lycos.fr
The same that 3, but in French

5. http://www.iespana.es
100 MB de espacio, php 4 light, base de datos (no mysql), no music, no audio, no flash(.mp3, .mid)

6. http://www.ifrance.fr
The same that iespana but in French.

7. http://www.host.sk
Very good, 150 MB storage whitout limit transfer, without advertisements, php/mysql

8. http://www.websinlimites.com
Very good, but, it's for web with a lot of visits, 4000 visits diary, and be accepted , php/mysql without advertisements.

9. http://www.vivelared.com
need 1000 visity diary.

11. http://www.geocities.com
Suport  php, but mysql no, 15 MB storage, so recommened.

12. http://www.blinkster.com

13. http://www.tripod.com
20MB storage and 1GB of transfer.

14. http://www.coolfreepages.com
Suport php/mysql no phpmyadmin.

15. http://www.spaceports.com

16. http://www.angelfire.com
50 MB storage

17. http://www.fortunecity.es

18. http://galeon.hispavista.com/ 

Redirections:
1. http://www.dot.tk
know like .tk

2. http://www.cjb.net

3. http://www.dominiosfree.com

4. http://www.freedomainname.co.nr

5. http://www.lanzadera.ya.com

6. http://www.shorturl.com

7. http://www.5xn.com

Discover how to install Ubuntu and Unity 8!


unity 8


Canonical has just done can download and install Unity 8 on any Ubuntu system by simply adding a PPA, resynchronize the repositories and install the appropriate packages. The only two ways that had until now to try Unity eight-and Mir was also download an ISO image to execute the latest version of the desktop or run it on a virtual machine, or so we thought.None of the two solutions just mentioned is too attractive, but there is a third way that, ultimately, it is more comfortable, more elegant and, to top it off, runs on any operating system from Ubuntu 12.04 LTS version onwards.Apparently, this simple procedure to install Unity 8 has been available for quite some time, but was not announced properly fastened and very few people knew anything about him. Fortunately, there is always someone who is responsible for collecting this information, and we will offer it to our blog. It should work without any problem as long as the case of one of the supported versions of ubuntu.

How to install Unity 8.

Execute the follow commands.

 sudo apt-add-repository ppa:unity8-desktop-session-team/unity8-preview-lxc
 sudo apt-get update
 sudo apt-get upgrade
 sudo apt-get install unity8-lxc
 sudo unity8-lxc-setup
 
 
 And that's it, basically. There is, however, a couple of points to mention. First, we see that the LightDM  
that we receive when logging is something different from what we usually see,  
and will cost a while until it is installed
It will also be necessary to restart the operating system.

 This way you can have Unity 8 and Mir installed on your computer, and you can try new solutions 
Ubuntu graphical environment before they are officially released.

Download and install Peppermint 6

Download and install Peppermint 6 and revives an old computer or with limited resources.


peppermint 6


 Peppermint 6 is a distro Linux based in Lubuntu, one of the officers 'flavors' of Ubuntu that can be found now on the market. In case anyone does not know, it's worth remembering that Lubuntu uses LXDE desktop, one of the lightest that currently exist, and Peppermint OS 6 has undergone some cosmetic changes.

This kind of remix of Lubuntu is available in two standard versions, each depending on the architecture of the computer you're using that is i386 and amd64-, and you can download the ISO image to the end of the article.

Both the image of Peppermint 6 for 32-bit systems, such as the image for 64-bit systems, weighing approximately 700 MB each. Once you've downloaded the image that corresponds to your architecture, we recommend that you transfer the contents to a bootable USB to install or test system faster and more stable.


 Main features of Peppermint 6:


 peppermint 6 1

Being based on an operating system that has the "mother" of Ubuntu, Peppermint 6 incorporates a boot menu in the live session is reminiscent of Lubuntu. This menu allows the user to test the system without having to install, install the operating system directly, test memory, boot from the local hard drive or find fault with the disc. This last option is available only if we start from a CD and not from a USB.
One of the biggest attractions of Peppermint 6 is its highly personalized LXDE version, which uses a unique distribution panel we see at the bottom of the screen. Besides this, the visuals have a white theme inspired by the art developed for the operating system.
The main applications of Peppermint 6 are, among others, PCManFM file manager, viewer iimágenes Mirage, GNOME MPlayer player, the Chromium browser, audio player Guayadeque and the Gedit text editor, as well as an unexpected additions Dropbox client.


What do you need to install Peppermint 6?
 
 
 peppermint 6 2
 
 As a distribution based on Lubuntu, Peppermint 6 uses LXDE and therefore is focused on old or limited to using this distro probably revive resources teams. Still, before downloading should take into account the system requirements to ensure proper operation.
Minimum requirements for Peppermint 6

     256 MB of RAM
     Processor based on the Intel x86 architectures
     At least 3 GB of space on your hard disk.


Recommended requirements Peppermint 6

     512 MB of RAM
     Processor based on the Intel x86 architectures
     At least 4 GB of space on your hard disk.


If you have an older PC or limited, and think Peppermint 6 may be the solution for you, go to the buttons you see below to give it a try.

viernes, 5 de junio de 2015

Pinguy OS based on Ubuntu

Many users of Ubuntu and distributions derived from the solution of Canonical certainly look forward to this news, which refers to a new distribution which is based precisely on Ubuntu but based on that point then added much of what users may need.


WebUpd8 us about Pinguy OS, a distribution that is a Ubuntu "remastered" that integrates a lot of default applications, plus PPA repositories enabled by default, which for example allow from the beginning count with
CoverGloobus, Gloobus Preview, GNOME Do or Docky.


http://www.linuxuser.co.uk/wp-content/uploads/2011/02/Pinguy-OS-03.jpg


Install XFCE 4.10 in Linux Mint 15

In the terminal execute the follow commands:

sudo add-apt-repository ppa:xubuntu-dev/xfce-4.10
sudo apt-get update
sudo apt-get install xfce4


 Then of this, close our session and choose the desktop XFCE.


http://ww3.sinaimg.cn/large/a74ecc4cjw1dx3xc8mxm9j.jpg

http://liveusb-xfce.sourceforge.net/images/xfce1.png


Install Nagios 4.0.8 on Ubuntu 15.04

Nagios® Core™ is an Open Source system and network monitoring application. It watches hosts and services that you specify, alerting you when things go bad and when they get better.Nagios Core was originally designed to run under Linux, although it should work under most other unices as well.
Nagios Features
Some of the many features of Nagios Core include:
Monitoring of network services (SMTP, POP3, HTTP, NNTP, PING, etc.)
Monitoring of host resources (processor load, disk usage, etc.)
Simple plugin design that allows users to easily develop their own service checks
Parallelized service checks
Ability to define network host hierarchy using "parent" hosts, allowing detection of and distinction between hosts that are down and those that are unreachable
Contact notifications when service or host problems occur and get resolved (via email, pager, or user-defined method)
Ability to define event handlers to be run during service or host events for proactive problem resolution
Automatic log file rotation
Support for implementing redundant monitoring hosts
Optional web interface for viewing current network status, notification and problem history, log file, etc.

Preparing your system
First You need to make sure you have install Ubuntu 15.04 LAMP Server and once you have that follow the next steps.
Switch to root user and run the all the commands
sudo su --
Install the following packages
apt-get install build-essential php5-gd wget libgd2-xpm-dev libapache2-mod-php5 apache2-utils daemon
You need to create nagios user,nagcmd group and add the nagios,apache user to the part of nagcmd group
useradd nagios
groupadd nagcmd
usermod -a -G nagcmd nagios
usermod -a -G nagcmd www-data
Download Nagios core DIY Source from here
cd /tmp/
wget http://prdownloads.sourceforge.net/sourceforge/nagios/nagios-4.0.8.tar.gz
tar -zxvf /tmp/nagios-4.0.8.tar.gz
cd /tmp/nagios-4.0.8/
Compile and install Nagios Using the following commands
make all
make install
make install-init
make install-config
make install-commandmode
make install-webconf
make install-exfoliation
Configure Nagios web Interface
Create nagiosadmin account using the following command
htpasswd -c /usr/local/nagios/etc/htpasswd.users nagiosadmin
Enable CGI module and restart the apache2 server
a2enmod cgi
service apache2 restart
Install Nagios Plugins
Download and install nagios plugins using the following commands
cd /tmp
wget http://nagios-plugins.org/download/nagios-plugins-2.0.3.tar.gz
tar -zxvf /tmp/nagios-plugins-2.0.3.tar.gz
cd /tmp/nagios-plugins-2.0.3/
Compile and install nagios plugins using the following commands
./configure --with-nagios-user=nagios --with-nagios-group=nagios
make
make install
Start Nagios
Verify the sample nagios configuration files using the following command
/usr/local/nagios/bin/nagios -v /usr/local/nagios/etc/nagios.cfg
Output
Nagios Core 4.0.8
Copyright (c) 2009-present Nagios Core Development Team and Community Contributors
Copyright (c) 1999-2009 Ethan Galstad
Last Modified: 08-12-2014
License: GPL
Website: http://www.nagios.org
Reading configuration data...
Read main config file okay...
Read object config files okay...
Running pre-flight check on configuration data...
Checking objects...
Checked 8 services.
Checked 1 hosts.
Checked 1 host groups.
Checked 0 service groups.
Checked 1 contacts.
Checked 1 contact groups.
Checked 24 commands.
Checked 5 time periods.
Checked 0 host escalations.
Checked 0 service escalations.
Checking for circular paths...
Checked 1 hosts
Checked 0 service dependencies
Checked 0 host dependencies
Checked 5 timeperiods
Checking global event handlers...
Checking obsessive compulsive processor commands...
Checking misc settings...
Total Warnings: 0
Total Errors: 0
Things look okay -- No serious problems were detected during the pre-flight check
If you are not seeing any errors the start nagios using the following
/etc/init.d/nagios start
When i try to start the nagios i got the following error and found out there is an issue with nagios init script
[....] Starting nagios (via systemctl): nagios.serviceFailed to start nagios.service: Unit nagios.service failed to load: No such file or directory. failed!
Solution to nagios init script
Copy /etc/init.d/skeleton to /etc/init.d/nagios using the following command
cp /etc/init.d/skeleton /etc/init.d/nagios
Now edit the nagios file
vi nagios
add the following lines
DESC="Nagios"
NAME=nagios
DAEMON=/usr/local/nagios/bin/$NAME
DAEMON_ARGS="-d /usr/local/nagios/etc/nagios.cfg"
PIDFILE=/usr/local/nagios/var/$NAME.lock
Save and exit the file
Finally you need to change the permissions of the file
chmod +x /etc/init.d/nagios
You can start the nagios using the following command
/etc/init.d/nagios start
Ouput
* Starting Nagios [ OK ]


Screenshots
1
2

Install qBittorrent on Ubuntu 15.04

The qBittorrent project aims to provide a Free Software alternative to µtorrent. Additionally, qBittorrent runs and provides the same features on all major platforms (Linux, Mac OS X, Windows, OS/2, FreeBSD).

qBittorrent Features
Polished µTorrent-like User Interface
Well-integrated and extensible Search Engine
Simultaneous search in most famous BitTorrent search sites
Per-category-specific search requests


Install qBittorrent on Ubuntu 15.04
Open the terminal and run the following commands
sudo add-apt-repository ppa:qbittorrent-team/qbittorrent-stable
sudo apt-get update
sudo apt-get install qbittorrent
Screenshots

1
2
3
4

Kali Linux on Android using Linux Deploy

Kali Linux on any Android Phone or Tablet

linux-deploy-kali-list-00Getting Kali Linux to run on ARM hardware has been a major goal for us since day one. So far, we’ve built native images for the Samsung Chromebook, Odroid U2, Raspberry Pi, RK3306, Galaxy Note 10.1, CuBox, Efika MX, and BeagleBone Black to name a few. This however does not mean you cannot install Kali Linux in a chroot on almost any modern device that runs Android. In fact, the developers of Linux Deploy have made it extremely easy to get any number of Linux distributions installed in a chroot environment using a simple GUI builder.
Prerequisites
  • A device running Android 2.1 and above, rooted.
  • At least 5 GB free space on internal or external storage.
  • A fast, wireless internet connection.
  • Patience to wait for a distribution to bootstrap from the network.
Configuring Linux Deploy for Kali
There’s actually very little to be done to get Kali installed. By choosing Kali Linux in the “Distribution” tab, you’ve pretty much covered the important stuff. Optionally, you can choose your architecture, verify that the Kali mirror is correct, set your installation type and location on your Android device, etc. Generally speaking, the defaults provided by Linux Deploy are good to begin with.
Building the Kali Image

install-kali-linux-deployOnce you are happy with all the settings, hitting the “install” button will start a Kali Linux bootstrap directly from our repositories. Depending on your Internet connection speed, this process could take a while. You’ll be downloading a base install of Kali Linux (with no tools) at minimum.
Starting up your chrooted Kali
linux-deploy-mountOnce the installation is complete, you can have Linux Deploy automatically mount and load up your Kali Linux chroot image. This also includes the starting of services such as SSH and VNC for easier remote access. All of this is automagically done by hitting the “start” button. You should see Linux Deploy setting up your image with output similar to the following:

At this stage, Linux Deploy has started a VNC and SSH server inside your chrooted Kali image. You can connect to the Kali session remotely using the IP address assigned to your Android device (in my case, 10.0.0.10).
Logging in to your chrooted Kali
Now you can use either a SSH or VNC client to access your Kali instance. The VNC password is “changeme” and the SSH credentials are “android” for the username (configured via Linux Deploy) and “changeme” as the password.


muts@slim:~$ ssh android@10.0.0.10
android@10.0.0.10 password:
Linux localhost 3.4.5-447845 #1 SMP PREEMPT Fri Apr 12 17:22:34 KST 2013 armv7l
Kali GNU/Linux 1.0 [running on Android via Linux Deploy]
android@localhost:~$ sudo su
root@localhost:/home/android# df
Filesystem 1K-blocks Used Available Use% Mounted on
/dev/loop3 4180944 667268 3304012 17% /
tmpfs 952708 80 952628 1% /dev
tmpfs 952708 0 952708 0% /dev/shm
root@localhost:/home/android#
root@localhost:/home/android# apt-get update
Hit http://http.kali.org kali Release.gpg
Hit http://http.kali.org kali Release
Hit http://http.kali.org kali/main Sources
Hit http://http.kali.org kali/contrib Sources
Hit http://http.kali.org kali/non-free Sources
Hit http://http.kali.org kali/main armel Packages
Hit http://http.kali.org kali/contrib armel Packages
Hit http://http.kali.org kali/non-free armel Packages
Ign http://http.kali.org kali/contrib Translation-en_US
Ign http://http.kali.org kali/contrib Translation-en
Ign http://http.kali.org kali/main Translation-en_US
Ign http://http.kali.org kali/main Translation-en
Ign http://http.kali.org kali/non-free Translation-en_US
Ign http://http.kali.org kali/non-free Translation-en
Reading package lists... Done
root@localhost:/home/android#
Image Size Considerations
If left unchanged, Linux Deploy will automatically set an image size of around 4 GB, for a “naked” installation of Kali. If you would like to install additional Kali tools down the road, you might want to consider using a larger image size, which is configurable via the settings in Linux Deploy.
Local VNC Connections
We had to try a couple of VNC clients to get one to work properly. Although controlling Kali through a local VNC client isn’t the most convenient of tasks, it certainly is possible. However, we suspect that most people will be SSH’ing into this instance. The picture below was overlayed with a Kali Linux desktop screenshot taken from a Galaxy S4.


 https://www.kali.org/wp-content/uploads/2013/09/galaxy-s4-kali-linux.jpg

jueves, 4 de junio de 2015

How to change the color in the control panel of Elementary OS Freya

This feature is not an element that we can configure, using Tweaks or through of the dconf-editor changing some parameter of the system.


Como cambiar el color al panel de elementary OS Freya

 This depend of our theme that we are using in our desktop also our wallpaper.

We should work with a copy of our theme, for this we need pantheon-files.
Location in the folder /usr/share/themes


Copia tema transparent


Rename our copy:


Renombrar tema transparent


 Using Tweaks for change our new theme, just we have to change the value in the GTK+THEME.


Tweaks


Go to the folder renamed:

Select carpeta tema

 In the folder gtk-3.0 edit the archive gtk.css


Editamos gtk


 We what the next:

Editor

 Insert the follow lines:

.panel {
    background-color: #b1c0dd; 
}


.composited-indicator {
    color: white;
}

 Then execute the follow command:

$killall wingpanel

And then We could change the values for anothers colours than we like to have.


miércoles, 3 de junio de 2015

Fedora 22

fedora22

We are proud to announce the official release of Fedora 22, the community-driven and community-built operating system now available in Cloud, Server, and Workstation editions.

If that’s all you need to hear, jump over to Get Fedora to download — or for current users, run the upgrade tool.

In addition to the latest versions of all your favorite free and open source software, Fedora 22 marks our second release with distinctly-targeted offerings for cloud computing, the server room, and the desktops and laptops of software developers and creators everywhere. Thanks to the hard work of developers, designers, packagers, translators, testers, documentation writers, and everyone else, we’re incredibly confident in saying that this is our best and most polished release yet.

Highlights in the Fedora 22 release

Every Fedora release has its own character. If this release had a human analogue, it’d be Fedora 21 after it’d been to college, landed a good job, and kept its New Year’s Resolution to go to the gym on a regular basis. What we’re saying is that Fedora 22 has built on the foundation we laid with Fedora 21 and the work to create distinct editions of Fedora focused on the desktop, server, and cloud (respectively). It’s not radically different, but there are a fair amount of new features coupled with features we’ve already introduced but have improved for Fedora 22.


Fedora Cloud

Fedora 22 Cloud edition has a number of interesting updates that should be exciting for users and developers.

    Updated Docker Images – The Fedora 22 release includes updated Docker images that you can use as the base of your containerized applications.
    Vagrant Boxes – One of the oft-requested features for Fedora is an “official” Vagrant box that developers can use to spin up images using the popular Vagrant tool for building development environments. With the Fedora 22 release we now offer Vagrant Boxes for libvirt and VirtualBox, so developers on Linux, Mac OS X, and Windows can spin up Fedora-based development environments with ease. Users can choose a Vagrant box for Fedora 22 Atomic Host and Fedora 22 Cloud base edition.
    Atomic Improvements – Fedora 22 Atomic Host includes a number of interesting improvements, including the Atomic command, updated Docker, Kubernetes, Flannel, and rpm-ostree packages.
    Dockerfiles – Fedora 22 also includes a fedora-dockerfiles package (and up-to-date git repository) for building applications with the base Fedora 22 Dockerfile and additional packages.


Fedora Server

    Database Server Role. The Fedora Server edition focuses on easy of different server roles. Fedora 21 debuted with an Domain Controller Role featuring FreeIPA. For this release, we’ve added a Database Server role, built around PostgreSQL.
    Default to XFS filesystem. The default file system type for Fedora Server installs will be XFS running atop LVM for all partitions except /boot. The /boot partition will remain a non-LVM, ext4 partition due to technological limitations of the bootloader.
    Cockpit will be compatible between OS releases. Cockpit is a server manager that makes it easy to administer your GNU/Linux servers via a web browser.
        Easy to use. Cockpit is perfect for new sysadmins, allowing them to easily perform simple tasks such as storage administration, inspecting journals and starting and stopping services.
        No interference. Jumping between the terminal and the web tool is no problem. A service started via Cockpit can be stopped via the terminal. Likewise, if an error occurs in the terminal, it can be seen in the Cockpit journal interface.
        Multi-server. You can monitor and administer several servers at the same time.


Fedora Workstation

    Better notifications. Thanks both to work done in GNOME 3.16 and other projects like the Automatic Bug Reporting Tool (ABRT), notifications keep you better informed, but interfere less with your work. They now appear anchored to the center of the top bar, and no longer cover up the bottom of the screen where you are often reading a terminal or browser. An unobtrusive marker appears in the calendar to let you know you have unread notifications. If ABRT detects a serious bug, a friendly notification appears and allows you to report the bug information, but doesn’t overload you with details. And if you’re a serious Terminal user, longer background jobs now notify you when they’re done, so you can get on with other work and pick up the results when you’re ready.
    Refined themes. The GNOME Shell and other themes and design are refined and improved. Now you can more easily identify information on the screen, adjust window size and placement, and navigate your files and folders. Improved bridging between desktop environment themes allows apps from other environments like KDE to look and feel more like native apps as they’re updated to take advantage of this feature. Standard scrollbars have been replaced by a minimal, overlaid indicator, while a scrollbar trough is shown when needed. This create a cleaner, less distracting view which helps you focus on window content. These “overlay scrollbars” are also better suited to mouse scroll wheels and touchpad scrolling.

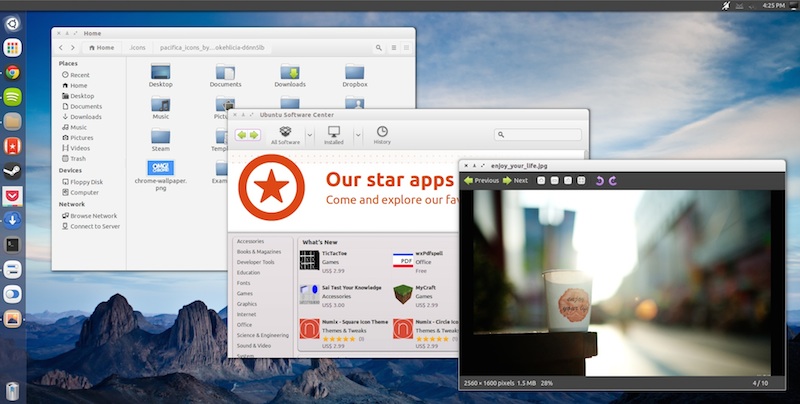
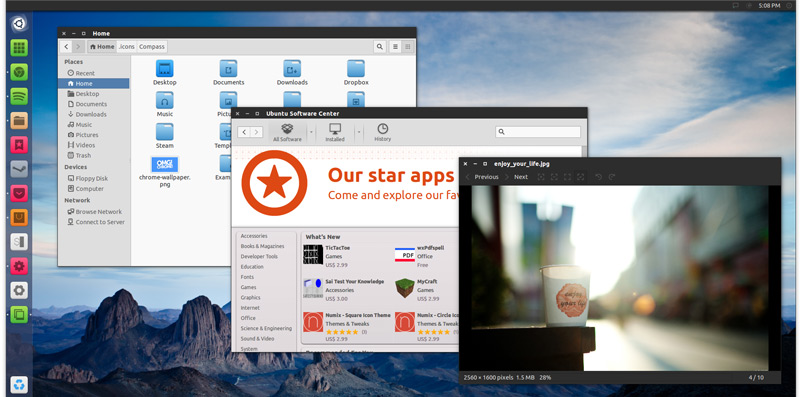
 Application improvements

    Software. The Software app has more and better data than ever before, and makes it easy for you to find a wide variety of useful free software. It also makes keeping your system up to date a snap. The Software app also can install all sorts of extras such as fonts or media helpers.

    Files. The updated layout in Files gives a better view of your files and folders, and a new view popover makes it easy to change the zoom level and sort order from a single place. You can also now move files and folders to the trash intuitively using the Delete key, rather than the Ctrl+Delete keyboard combination.

    Image Viewer. The Image Viewer has been redesigned to reduce the amount of window chrome and give more space to images.

    Boxes. The user interface for Boxes, the application for virtual and remote machines, has a large number of improvements, including new preferences dialogs, a revamped box creation assistant, a feature to send keyboard shortcuts to a box, and display scaling by default.

    Vagrant. Developers will appreciate the addition of software development environment software Vagrant into Fedora — it’ll work using our included virtualization technology, with no need to install third-party virtualization (like VirtualBox). Use this to work on top of the Cloud images mentioned above, or launch your own Vagrant boxes.